Basics
Open Firefox or Chrome (other browsers can be used, but Firefox and Chrome display Cascade best)Go to the Cascade URL and login with the instructions you were given in your training session.
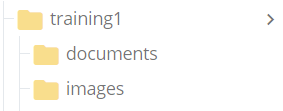
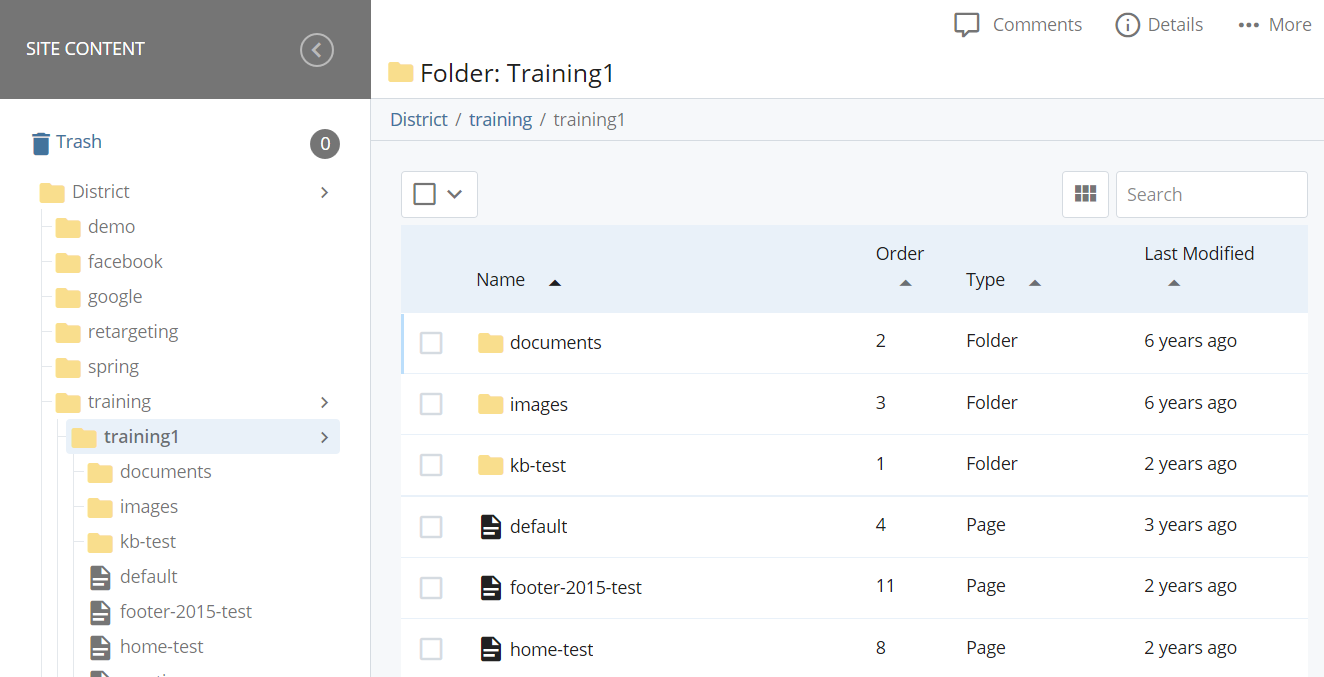
Each main folder will usually have a subfolder for documents and a subfolder for images.
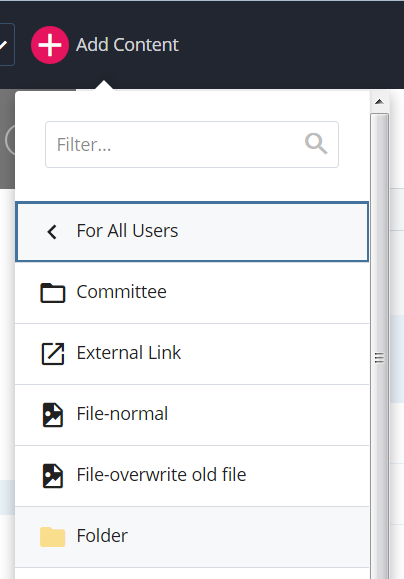
1. To add another subfolder, click +Add Content, For All Users, and select Folder.
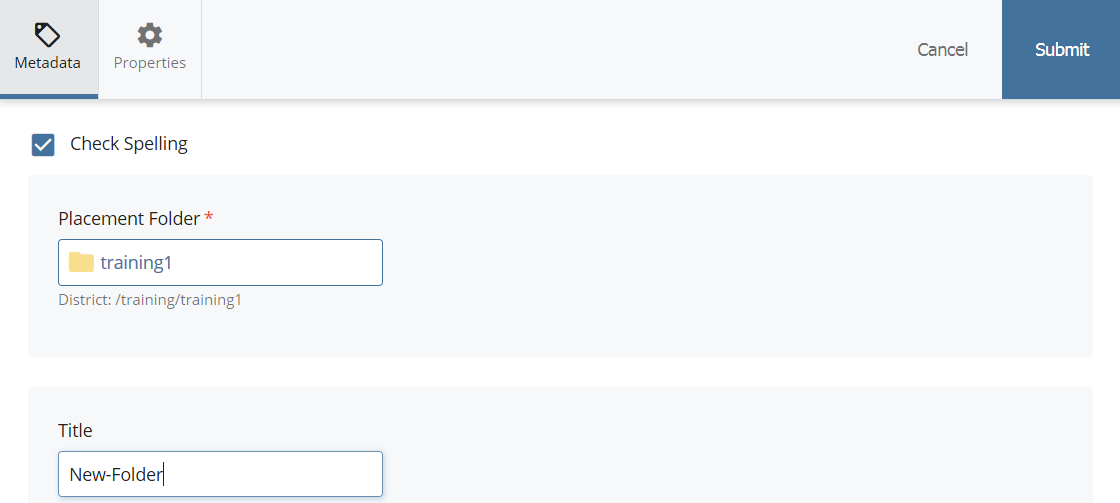
2. Click in the Placement Folder area and find the folder under which your new folder will be placed. Type in the name of the new folder (no spaces, use hyphens to separate words) and click Submit.
3. Click the Checkmark button on the right to finish:
4. Your new folder is now available. To rename a folder, right-click on the folder and select Rename.
1. Find your web site in the list of folders. Folders are displayed with a yellow folder symbol. Select the folder for the area you want to edit.
2. From the + Add Content menu, select the type of page layout that you want, usually a Standard Page:
3. Once you have clicked on the type of web page you want, you will note items marked with a red asterisk. These are required fields.
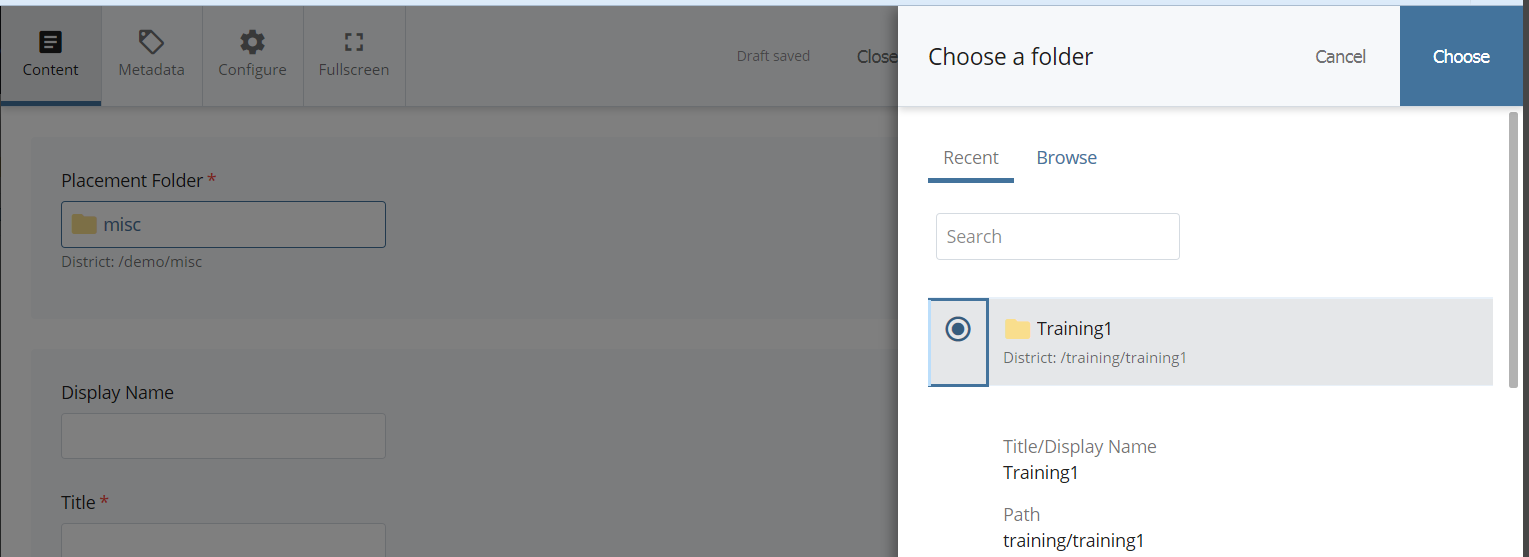
Choose a Placement Folder, then click the Choose button:
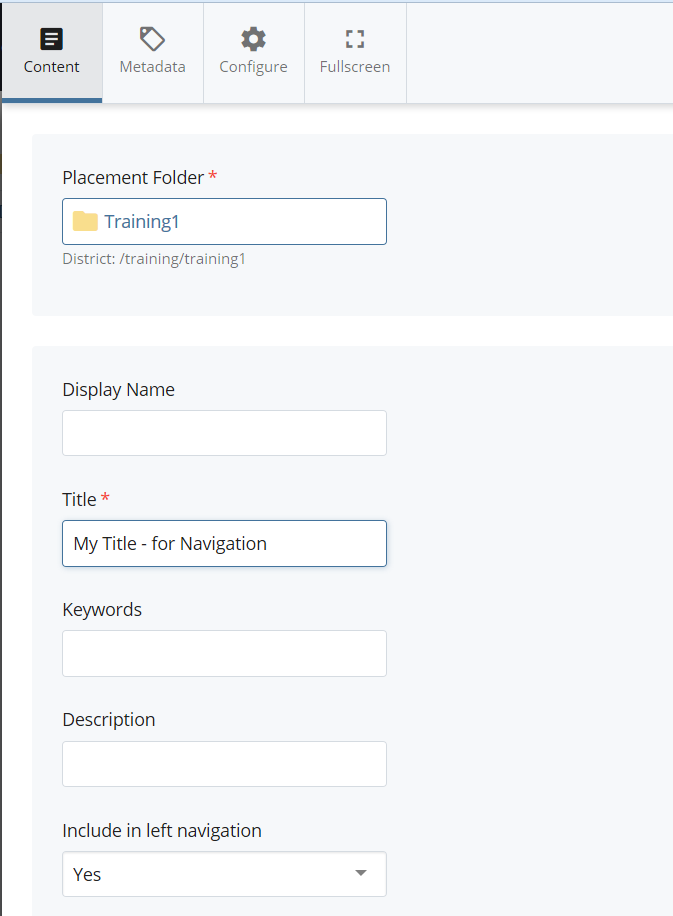
4. Fill in Content fields as needed:
- Title/Display Name: this will show in the navigation area on the left side of the page if you choose. You will probably want to type this title in Title Case. You should not use any special characters in this field.
- Keywords: these words will help a user find your page. Separate the keywords with a comma. For example, keywords might be – community college, your department name, any typical words that would be used when searching for this page
- Description: this a short summary. What words would you want Google or Yahoo to display when someone searches for your site?
- Include in left navigation: this tells the system whether you want this title to show in the navigation area on the left side of the page
5. Add your Main Title. Then type or copy and paste the information you want to display into the Main Content area. Some of the text formatting will automatically be done for you, but you can use the buttons on the toolbar to Bold, Italicize, etc.
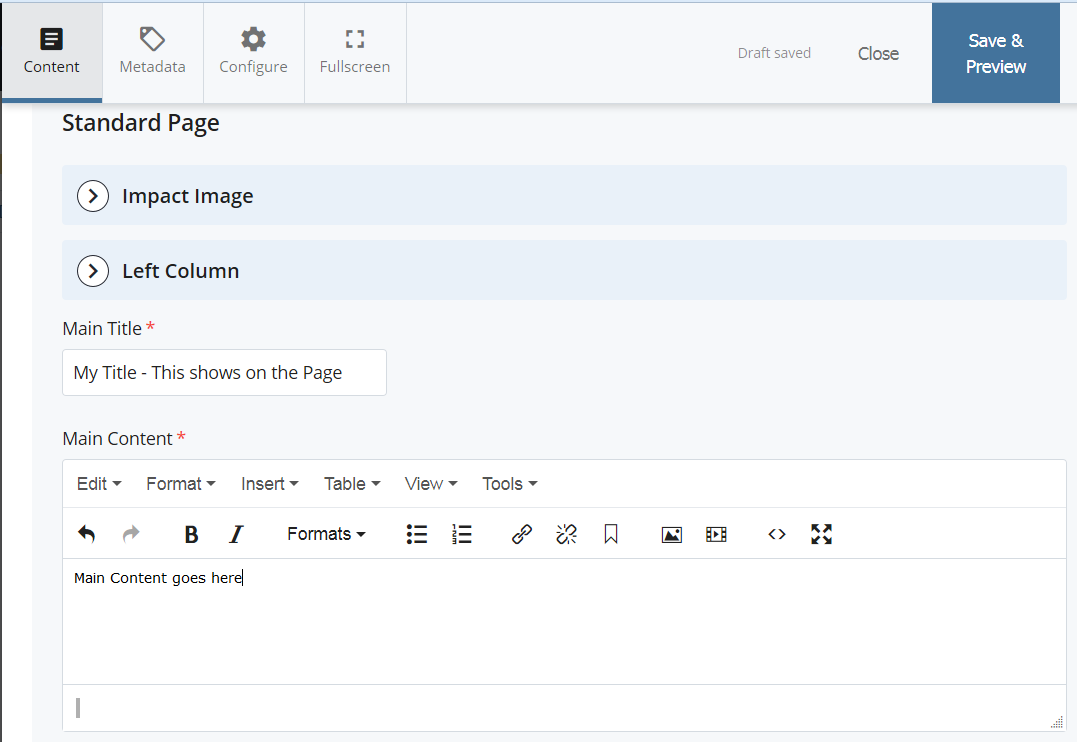
6. Edit any other areas of your page. Tip: If the content is required and you do not have information to add in this content area, just type a space.
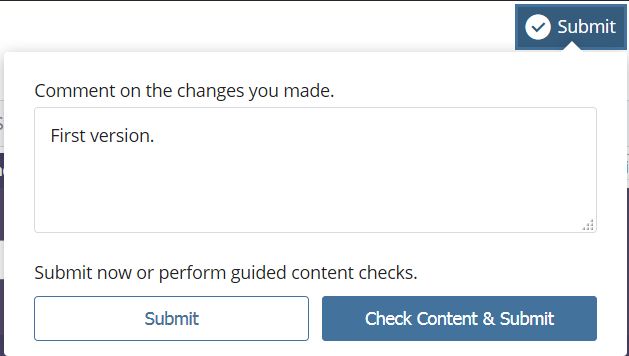
When you are finished, click the Save & Preview button. If you like what you see, click the Submit button. Note: you will not see your page in the left navigation list yet.
![]()
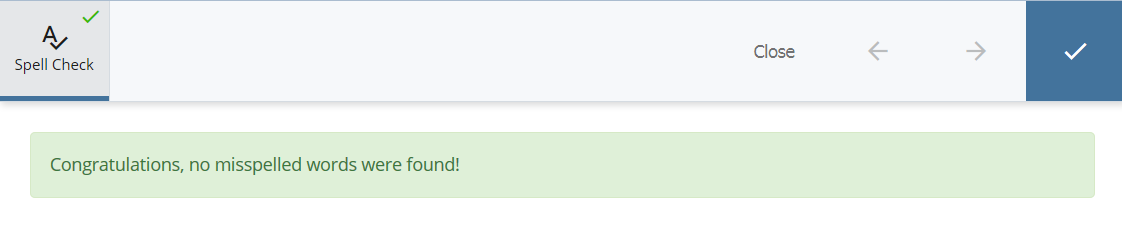
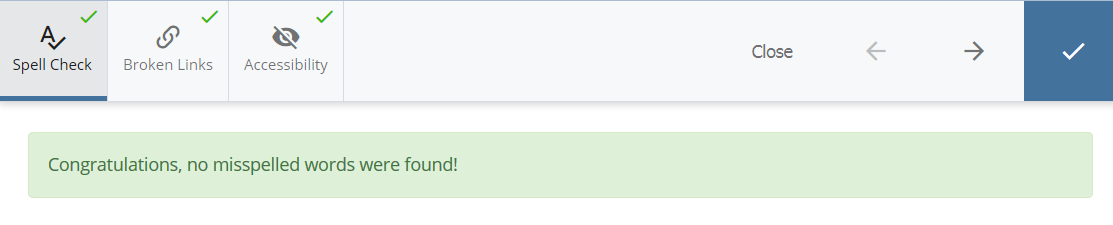
7. After clicking Submit, it’s best to then select the Check Content and Submit button. With this feature you will be notified of problems with Spelling, Broken Links, and Accessibility:
8. If all is good, click on the Checkmark button on the right to complete your submission:
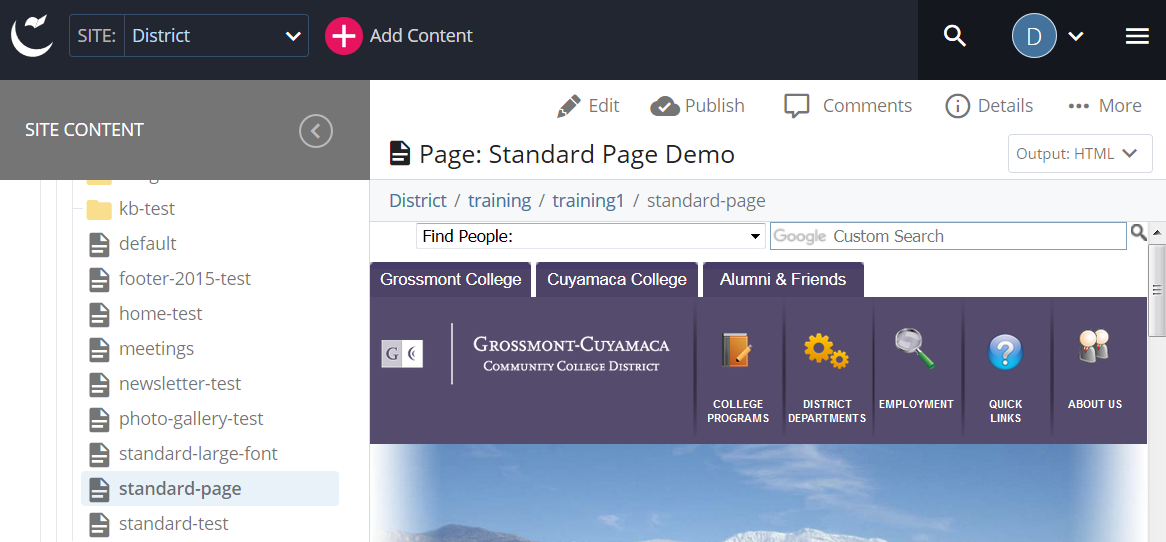
Your page has been created.
1. Find the web site folder and page you want to edit, and select the page.
2. Click the Edit button for the page.
3. Change any information on the page and click Save & Preview, then Submit.

![]()
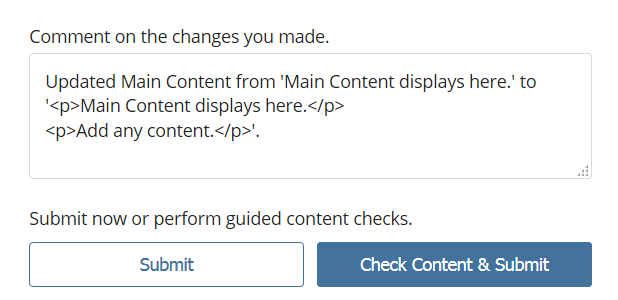
4. Comments on your changes will display and you can edit them if desired.
Click Check Content & Submit. If all is good, click on the Checkmark button to complete your submission.
5. Your page has been created. Comments will be automatically inserted, but you can alter them.
6. Don’t forget to Publish your edited page.
Each main folder will usually have a subfolder for documents and one for images.
Special Notes for images:
- Make sure the image is not too large. Right click on the file and select Properties. The file size should not be more than about 100kb. If it is much larger, you should copy it and change the proportion of height/width, or save it as a different file type (try .jpg, .gif, or .png), and/or lower the resolution to make it smaller.
- If you are using rotating pictures, they should be the same height and width.
ADD A SINGLE FILE
(if you are adding multiple files, skip down to ADDING MULTIPLE FILES)
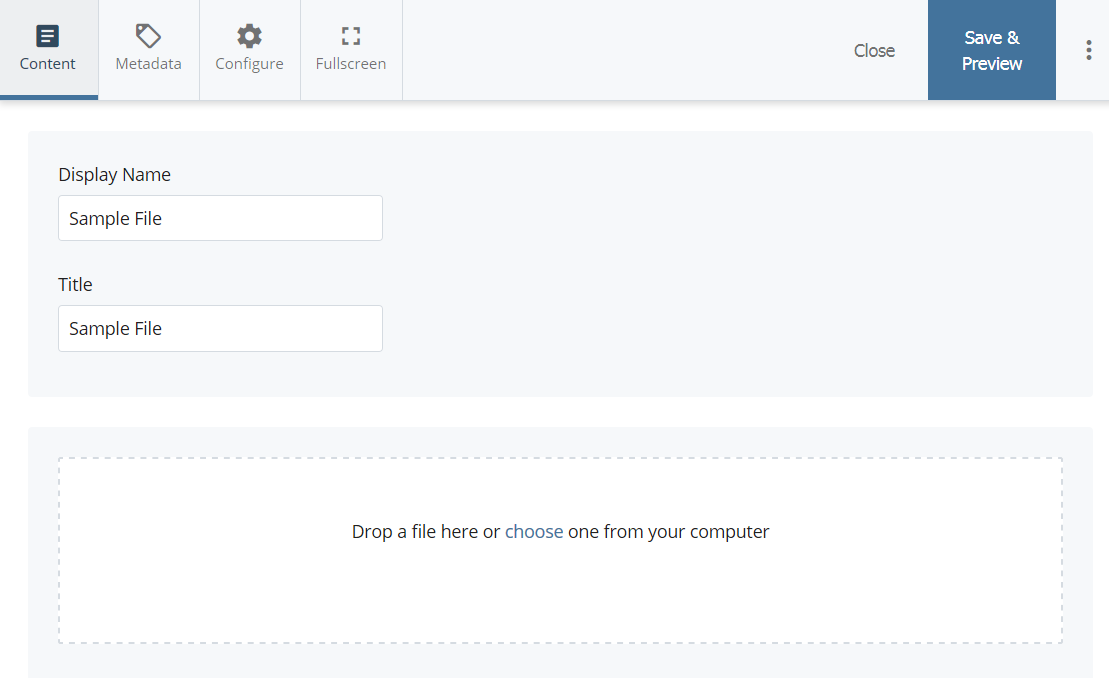
1. To add a file, select +Add Content, For All Users, and click File-normal.
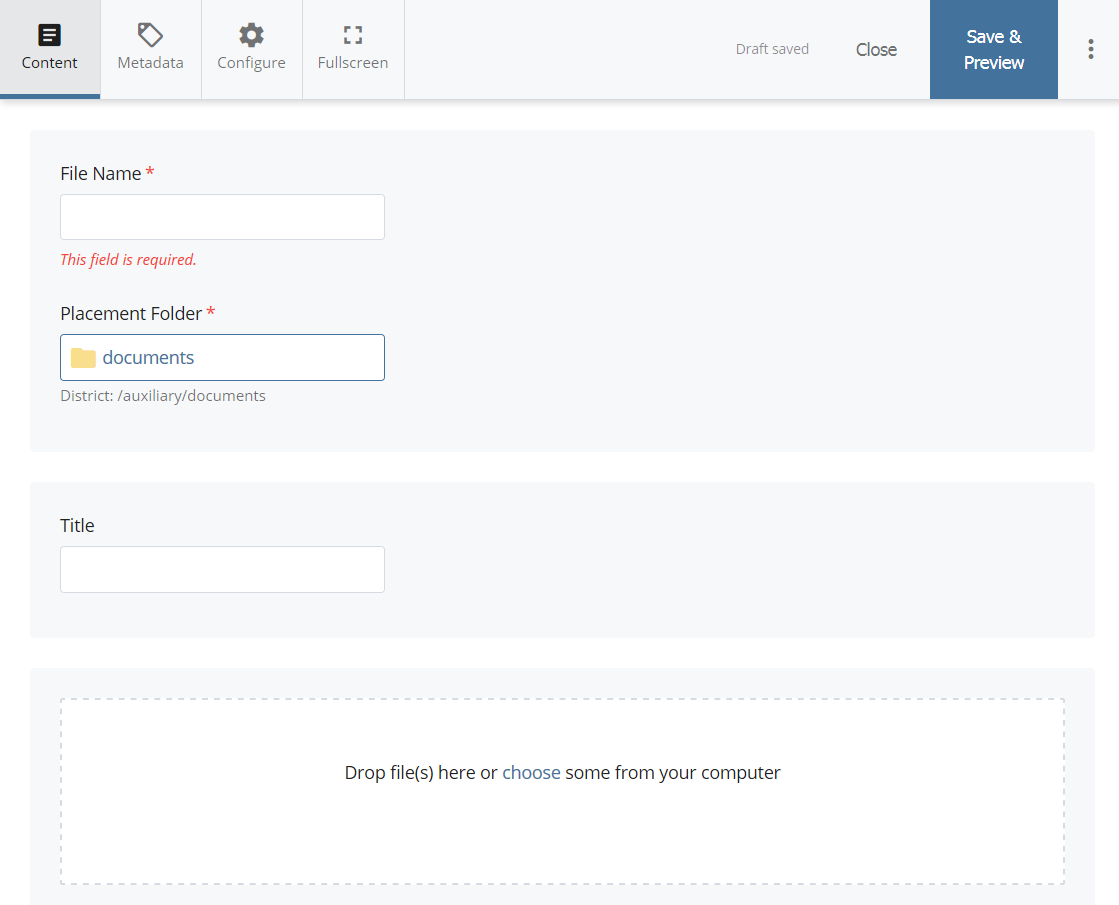
2. Now you can add the file. Click in the Placement Folder area and find the folder under which your new file will be placed.
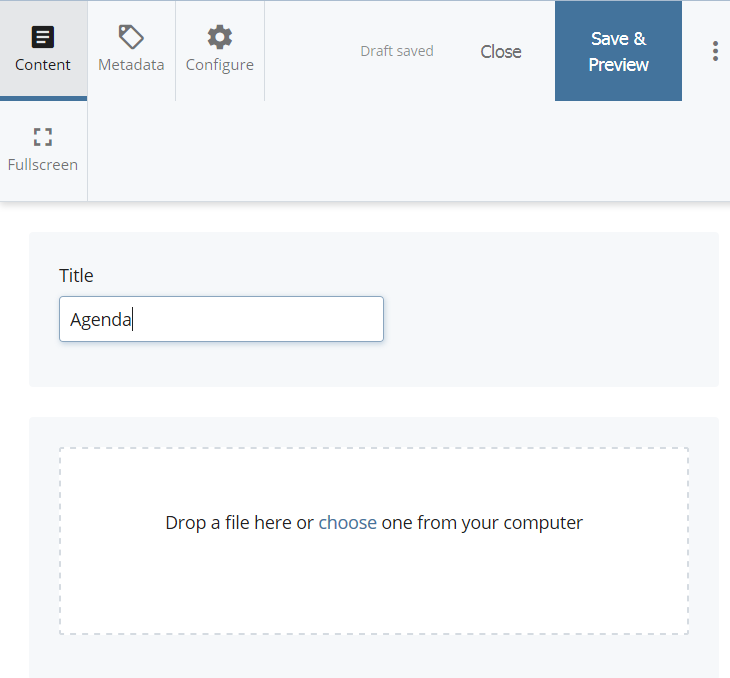
You may drag your file to the Drop file area OR click in that area and navigate to the file you want to upload. The file will automatically populate the File Name field.
Edit the name of the new file so there are no spaces; use hyphens to separate words.
You can also add a Title and/or Display Name to the file. If you are intending this file to show in the left navigation it is important to fill in these fields.
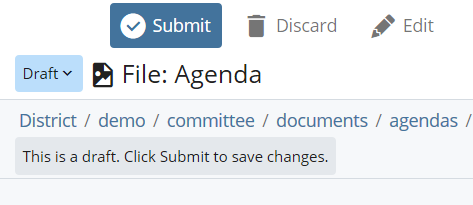
When you are finished, click the Save & Preview button.
3. If you like what you see, click the Submit button. Note: you will not see your page in the left navigation list yet.
![]()
4. It’s best to select the Check Content and Submit button. With this feature you can check for Spelling, Broken Links, and Accessibility.
5. If all is good, click on the Checkmark button to complete your submission.
ADDING MULTIPLE FILES
You may add more than one file at a time by uploading them at the same time.
1. Select +Add Content, For All Users, and click File-normal. Click in the Placement Folder area and find the folder under which your new file will be placed.
You may drag your files to the Drop file area OR click in that area and navigate to the files you want to upload.
You will get a message: Welcome to bulk file upload! If you want to return to the single file create experience, click Back.

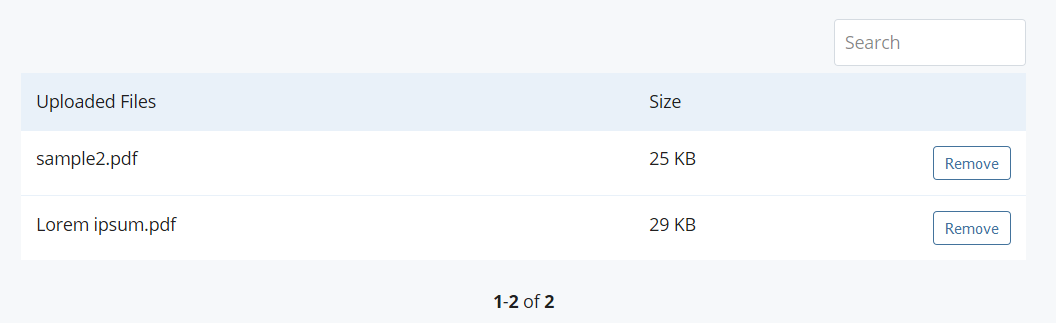
2. You can see the uploaded files at the bottom of the screen:
3. Click Submit and the files will be loaded into your folder.
4. To add a Title and/or Display Name, click on a file and select the Edit button. If you are intending this file to show in the left navigation it is important to fill in these fields.

5. After filling in the fields, click the Save & Preview button. Then click Submit.
1. Select the page you want to change and click the Edit button. In your Content area, select the text that will be linked. Click on the Insert/edit link button:
![]()
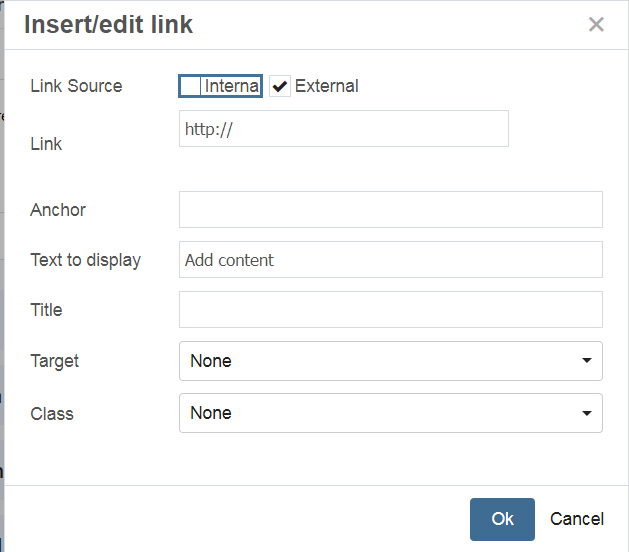
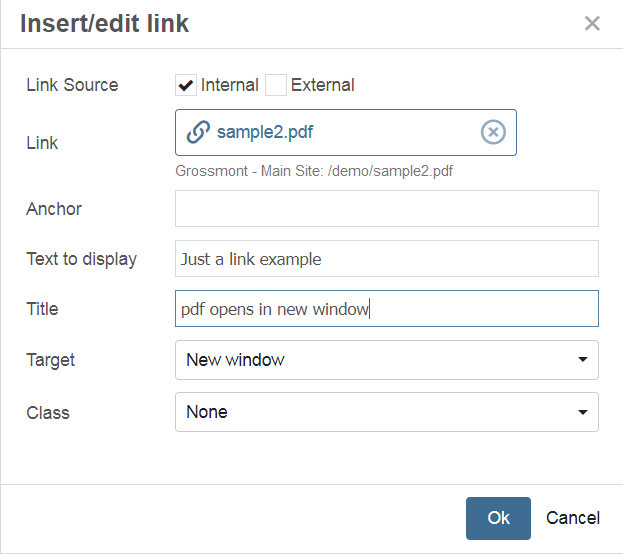
2. Select whether the link is Internal (in our web site) or External (somebody else’s web site).
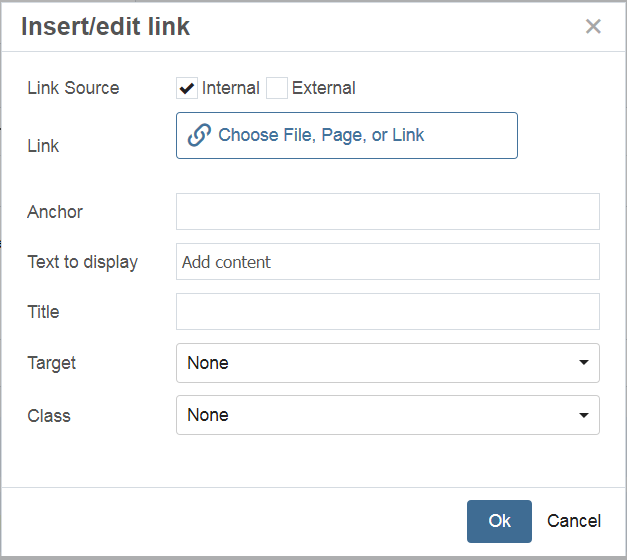
3A. If your link is INTERNAL, and you are linking to a recent page or file, it will display in the list.
(if link is External, skip to line 3B)
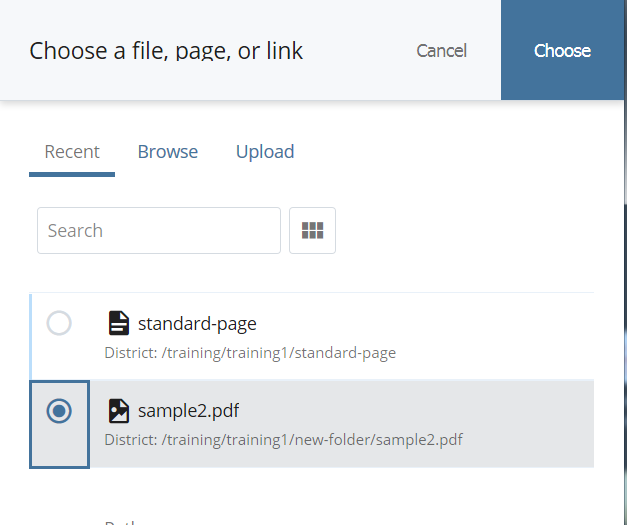
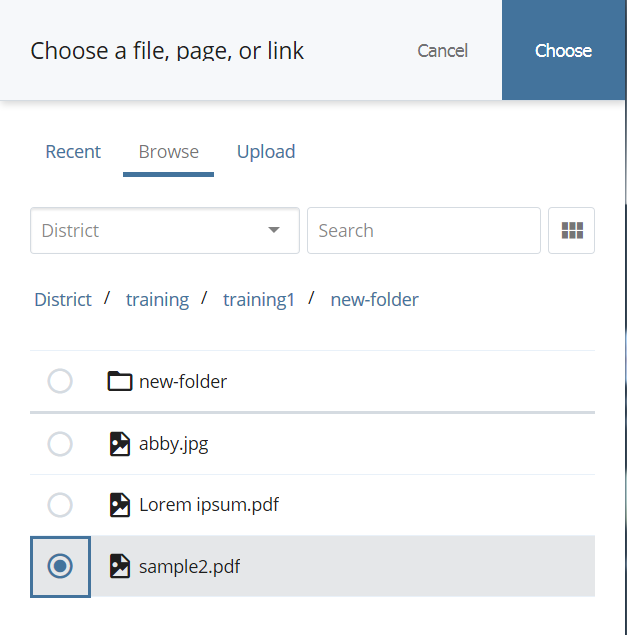
Otherwise click on Browse and navigate to the page or file you want to link to.
Select the file, page, or link you want and click the Choose button.
3B. If your link is EXTERNAL, click in the Link field and type in the URL for the web page you want to link to.
For an EMAIL LINK, the link field should be typed as:
mailto:emailaddress@domain.com
(ie: mailto:jane.smith@gcccd.edu
4. Note: If you want your link to open in a new web window, change the Target to New Window (this means the document or page will open in a separate browser window). If you do this, please add a Title that indicates ‘pdf or web page opens in new window’ for screen readers. Click OK.
5. Once you have completed adding your link, click Save & Preview.
6. After you have completed editing your page don’t forget to click Submit.
![]()
7. When you are ready to publish your page, select the Publish button.
It is very important that you do not use an image that is copyrighted!
Images need to be accessible. In order to do that, you will need to add alternate text so screen readers can ‘read’ the image.
You can upload the image file before adding it to a page OR you can upload the file while you are editing a page. If you are uploading an image before adding it to a page, follow the instructions under ‘ADDING A FILE’.
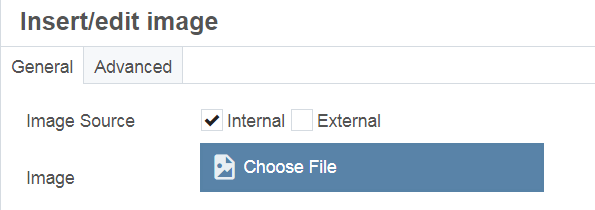
1. Select the page you want to change and click the Edit button. Place your cursor where you want to place the image. Click on the Insert/edit image button.

2. You will usually select Internal image source. Click on Choose File in the Image field:
3A. IF YOU HAVE ALREADY UPLOADED YOUR IMAGE FILE
(if you haven't, skip to line 3B)
If you are linking to a recent page or file, select it in the list.
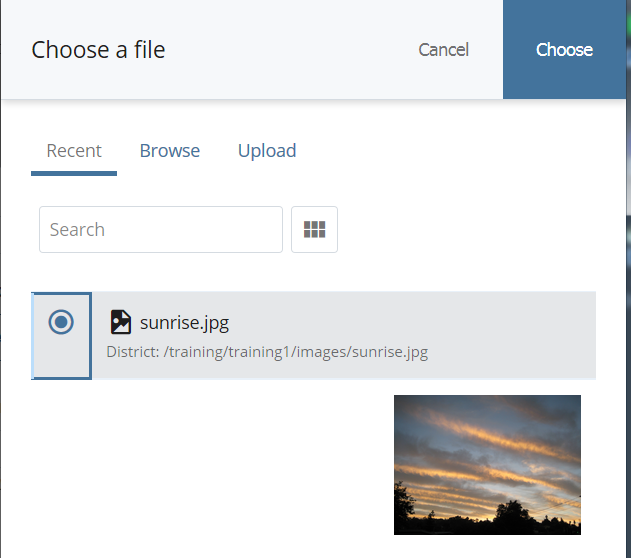
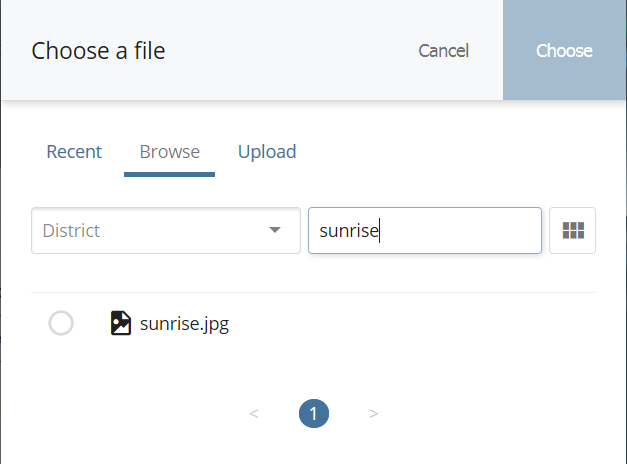
If your image file doesn’t show in the Recent list, click on Browse.
You can search for a file or navigate to the page or file you want to link to.
Select the file you want and click the Choose button.
3B. IF YOU HAVE NOT ALREADY UPLOADED YOUR IMAGE FILE
Click on Upload:
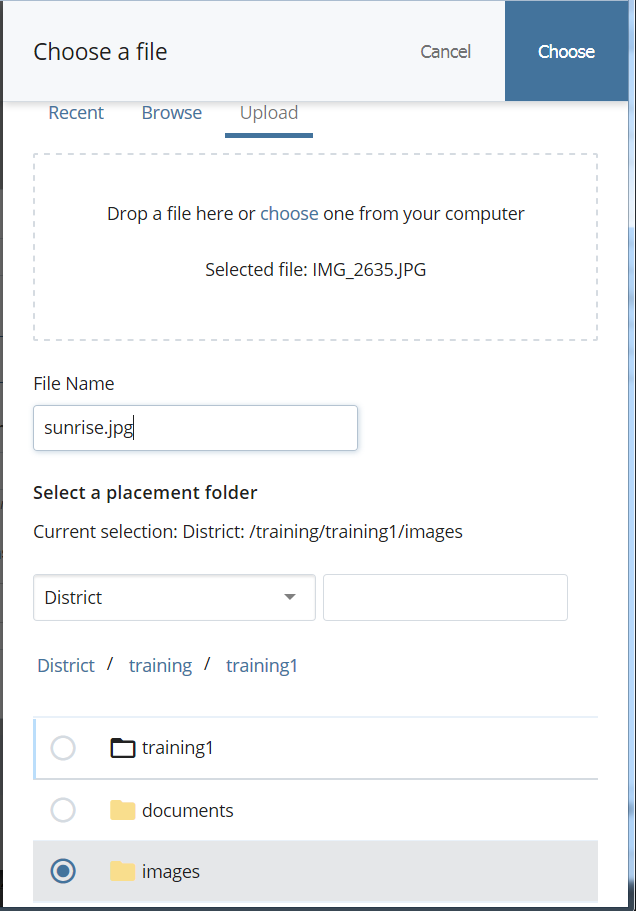
Either drag the file to the Drop file area, or click on the Drop file area and navigate to the file you want to upload.
You can change the name in the File Name field (no spaces! – use hyphens between words).
Select the placement folder (where do you want to place the file?), then click the Choose button.
4. In the Insert/edit image window:
- Check the Decorative field if the image does not convey any information.
- Otherwise add an Image description.
Make sure the Dimensions are not too large. For advice on dimensions, check out the section Images - Extra Help.
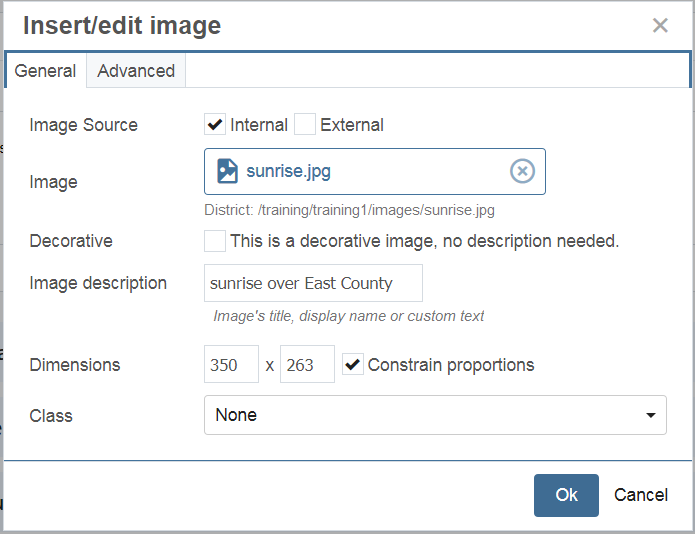
Click the Advanced tab if you want to add a Caption:
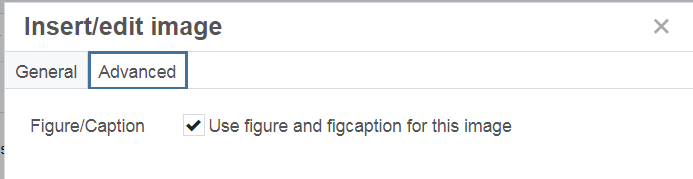
The screenshot below shows an example of a image with the caption 'sunrise over East County':

5. Click OK to add the image to your page.
If you want to change the alignment of your image, right-click on it, then select Align: Left, Center, or Right.
You can change the size of an image just as you would in MS Word; select the image, click on a resizing ‘square’ and drag it.
Instructions on editing an image within Cascade
6. Once you have completed adding your image, click Save & Preview.
7. After you have completed editing your page don’t forget to click Submit.
![]()
8. When you are ready to publish your page, select the Publish button.
How to Use the Image Editor in Cascade 8
Automatically change an image to fit the sidebar area (District and Intranet only):
There is an item to select when uploading an image called Sidebar Image – auto 240 wide. If you select that item when you upload a picture, it will automatically change the size so that it is 240pixels wide. This is about the size you need for sidebar pictures. Keep in mind that if you have a SMALLER image, it will not be a good idea to use it as it will stretch to 240pixels.
How to get the white 'faded' sides to the home page images: The following Photoshop files contain the basic graphics for the web sites.
Banner templates should be downloaded and used to prepare images with the 'fade' effect for the Home Page and interior page Banners.
If you want a link in your left navigation area to a document, another page, or another web site. You can add a page/file, create an Internal link, or create an External link to do this.
IF THE PAGE OR FILE HAS NOT BEEN ADDED TO CASCADE:
- Add a page or file to the same area as the default page. Make sure you enter the Title field.
IF THE PAGE OR FILE HAS ALREADY BEEN ADDED TO CASCADE (INTERNAL (in our web site)):
1. This may seem a little backwards, but in the District and Intranet sites select the file or page you want to link to.
If your reference link is to a file, make sure the file has a title: click Edit and check to make sure the Title field has been filled in. This is the text that will show in the Navigation area. Click Save & Preview.
2. You will see the title that has been entered and a reminder to click Submit to save changes. Click the Submit button, then Submit again.
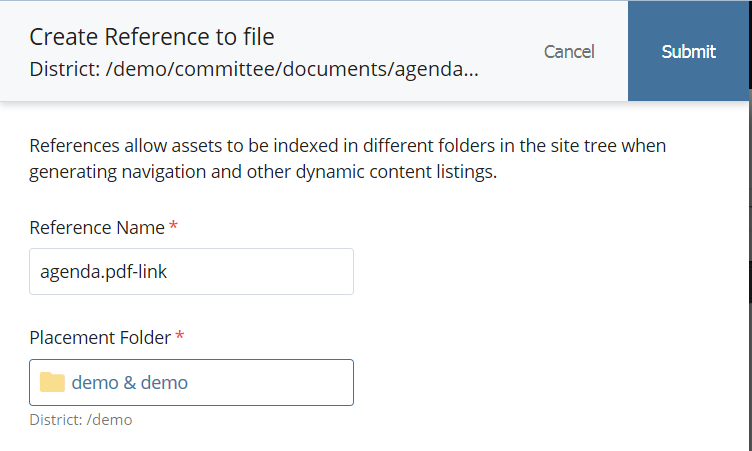
3. With the file/page still selected, click the More menu on the upper right, and select Reference:
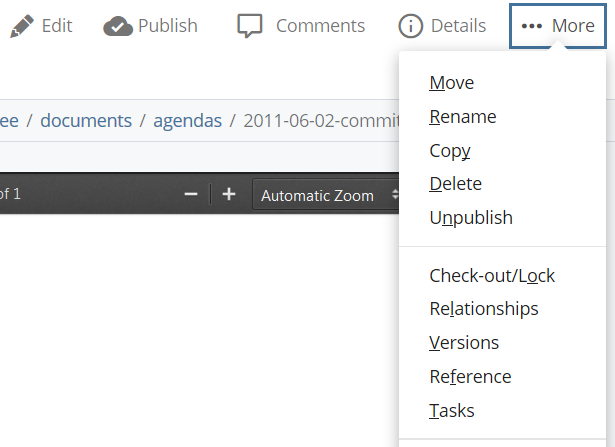
4. Add ‘–link’ to the end of the Reference Name. This will help you remember what the link connects to.
Then click on the Placement Folder and browse to the folder where you want the link to be displayed.
Select the folder, click the Choose button, then the Submit button.
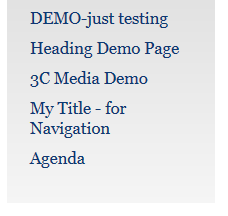
Your internal link will now be displayed in the Left Navigation:
If the entry in the Left Navigation displays as $_SerializerTool.serialize($title, true), it means you did not fill in the Title field for the file or page you are linking to. Follow the instructions in step 1 to correct this.
5. When you are ready to publish your page, select the Publish button.
IF THE PAGE OR FILE IS EXTERNAL (another web site):
1. Select the web site folder where the link should be displayed.
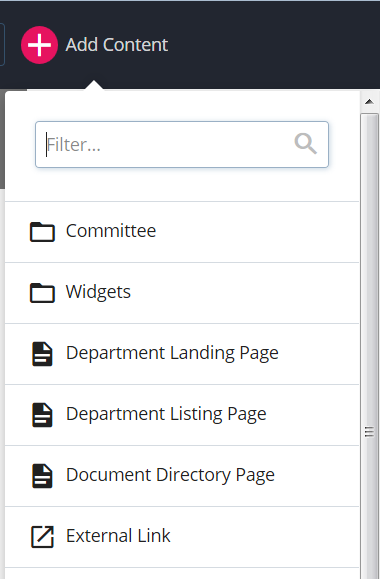
From the menu, select +Add Content, For All Users, External Link
Add the Link Name (no spaces, special characters, or capital letters), choose a different Placement Folder if necessary, Title (what text you want the link to display), and the Link URL itself.
Click Save & Preview button.
2. You will see the draft of your link. Click Submit and Submit again.
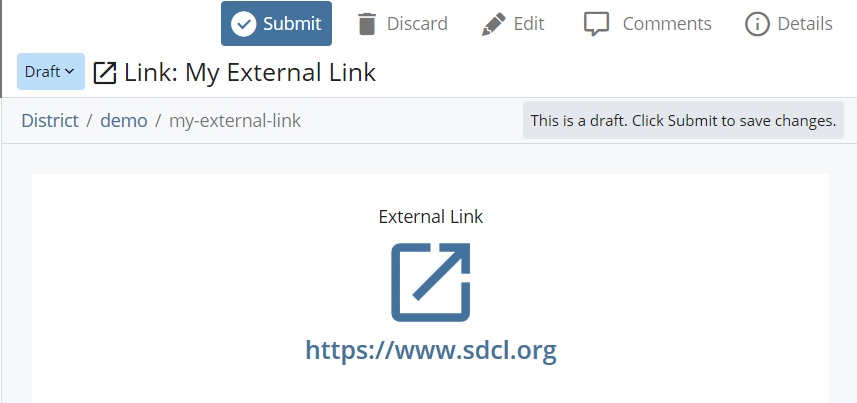
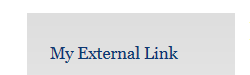
When you view your default page, the link should display with the text you typed in.
3. When you are ready to publish your page, select the Publish button.
You may want a link in your left navigation area to a document, another page, or another web site. You can create an Internal or External link to do this.
INTERNAL (in our web site)
(for External links outside of Cascade, see the EXTERNAL section below)
1. To add a link to another section within your site, first you will need to know the exact path to the page or file you wish to link to (e.g. /alumni-friends/default, which is the Alumni and Friends page).
NOTE: The item that you are linking to must be located within your site. If you wish to link to another site, see directions about External Links below.
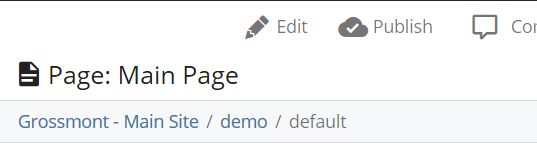
Navigate to the item that you want to link to.
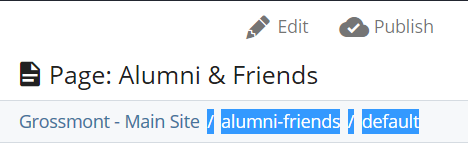
Copy the full Cascade path of that item, located above the Action Toolbar
(see example below of the path /alumni-friends/default)
If you do not have access to this page within Cascade, you can find it in the URL of the page. Use the path between the main college URL and the ending suffix.
For the link http://www.grossmont.edu/alumni-friends/default.aspx, you would use /alumni-friends/default
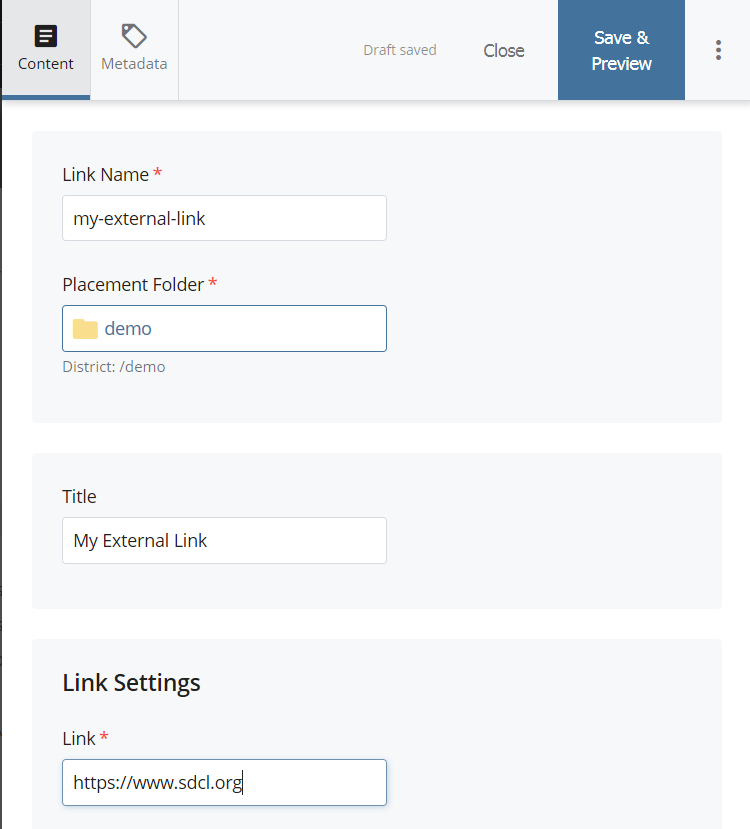
2. Navigate to the folder where you want to add the link. Click +Add Content, and then click External-link.
3. Type in the Link Name by replacing the value of 'external-link' (no spaces, just hyphens between words). Note that this value is for internal purposes only and will never be seen by your Web site visitors.
Check that the Placement Folder is the one where you are adding your link.
Type in a Display Name and a Title for your link. They are usually the same text.
In the Link field, replace the example with the path you copied.
NOTES for the Link field:
Be sure that there are no spaces BEFORE or AFTER the path you just typed in.
Do not put an extension on the link (e.g. “.aspx”).
Click the Save & Preview button.

4. Click Submit and Submit again to save the link.
![]()
When you view your folder's default page, the link should display in the Left Navigation.
IMPORTANT: Don’t forget to publish all pages containing navigation affected by the change!
EXTERNAL (another web site):
1. Select the web site folder where the link should be displayed.
From the menu, select +Add Content, For All Users, External Link.
2. Add the Link Name (no spaces, special characters, or capital letters).
Choose a different Placement Folder if necessary, Title (what text you want the link to display), and the Link URL including 'http' or 'https'.
Click the Save & Preview button.
3. You will see the draft of your link. Click Submit and Submit again.
When you view your default page, the link should display:
IMPORTANT: Don’t forget to publish all pages containing navigation affected by the change!
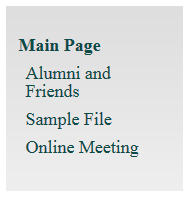
You may decide to change the order of your Left Navigation Links. This is easy to do.
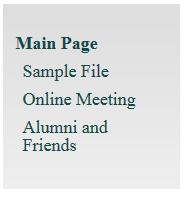
This screenshot shows the original order if links in the Left Navigation menu. Notice the 'Alumni and Friends' is listed fourth.
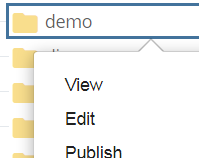
1. To change the order, select your web site folder and click on the Order arrow. If you do not see it, right-click the folder and select View.
This will list the items in the same order they are displayed in your Left Navigation.
2. Hover your cursor over the page/file/link you want to move. Drag the item to the place in the order you want it to display. You can also use the arrows in the Toolbar to move items.
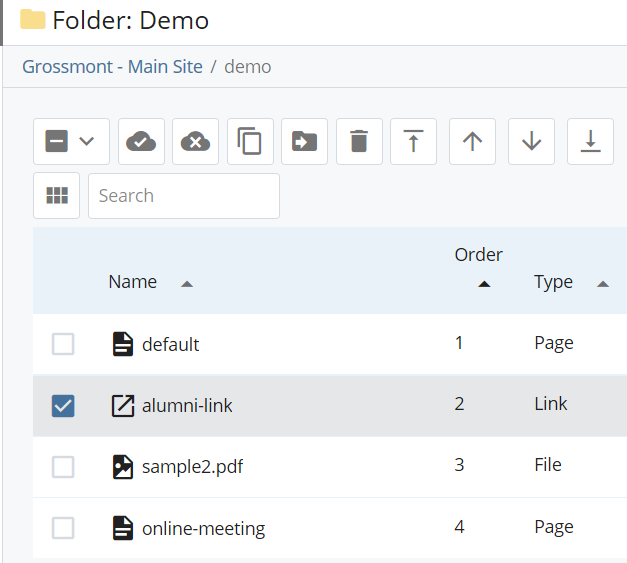
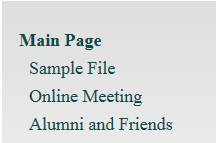
The order of the Navigation Link display will have changed. Notice that the 'Alumni and Friends' link is now listed second.
IMPORTANT: Don’t forget to publish all pages affected by the change!
If you have Publishing permissions, all you need to do to publish your page (show it on the Internet) is to select the Page or Folder, click the Publish button, then click Submit.
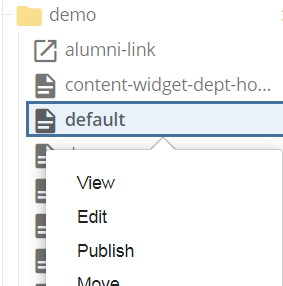
You can also right-click an page/file/folder and select Publish from the context menu, then click Submit.
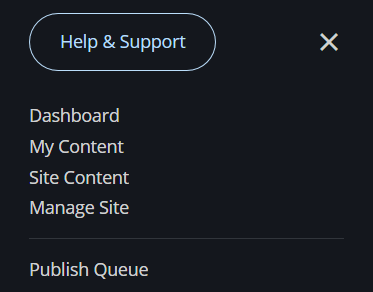
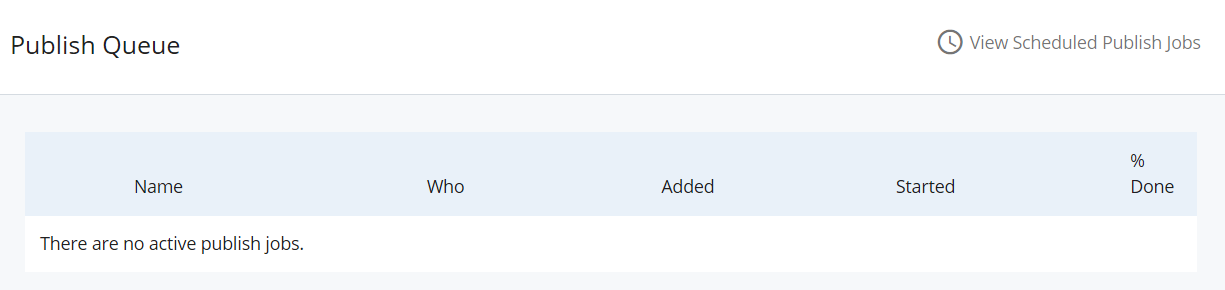
If you would like to view the Publish Queue, click the menu in the upper right corner of the screen and select that option.
![]()
The progress of the publishing will be displayed as a percentage.
It should not take long unless there are many Publish Queue jobs listed.
IMPORTANT TIP: If your page does not appear to have updated in your browser, you may need to press Ctrl-F5 to force your browser to update the cached view.
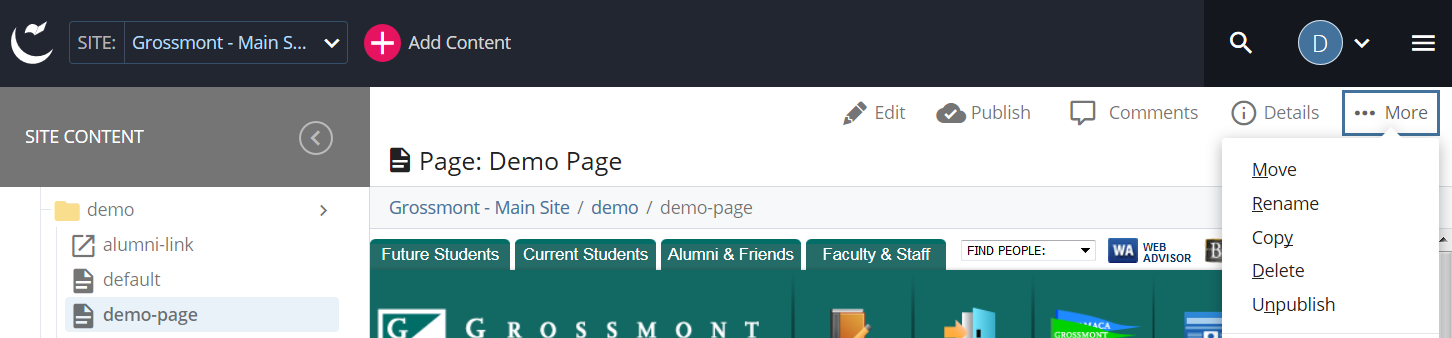
To copy an item (page, folder, file, etc.), select the item and click the More button, then click Copy.
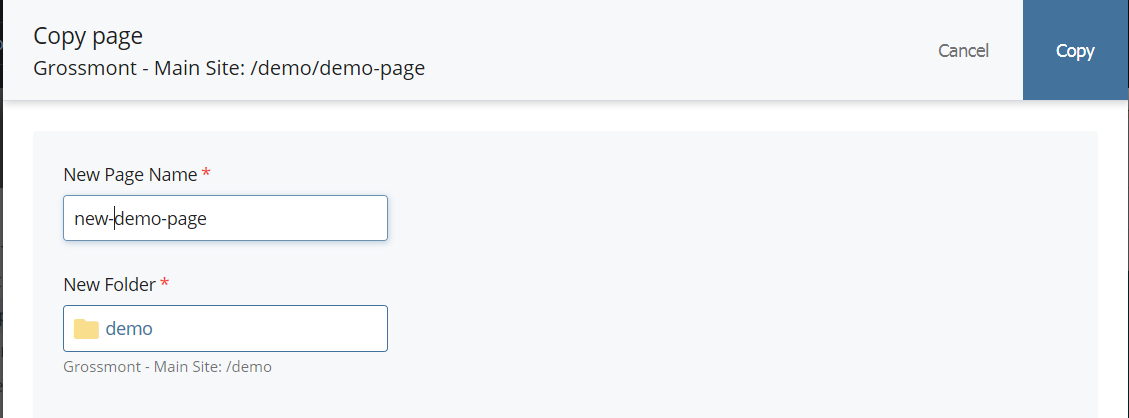
Depending on your permissions:
- Enter a New Name (all lowercase, use hyphens but no spaces or other special characters).
- If the folder displayed is not correct, click in the New Folder field and find the folder where the item should be placed.
- Click the Copy button.
DELETIONS
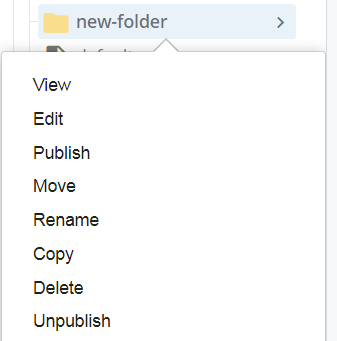
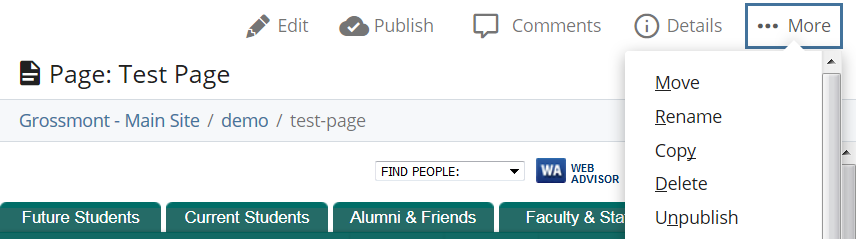
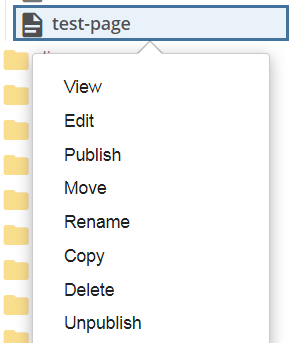
1. To delete an page/link/file, click on it, then click the More button in the upper right corner.
Click Delete from this menu.
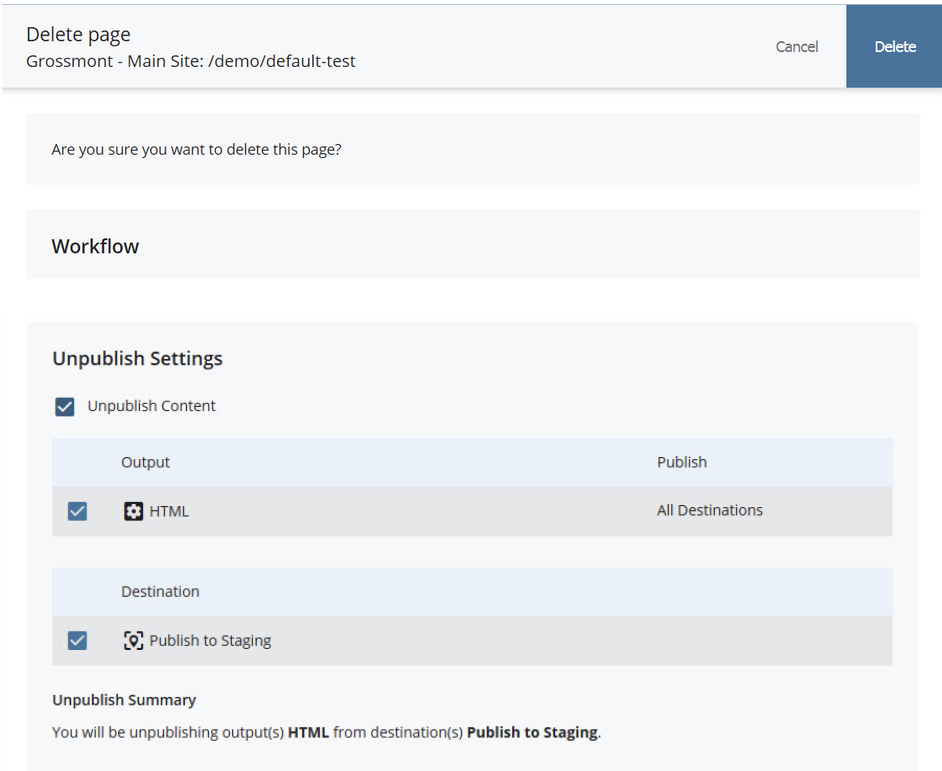
2A. The Delete confirmation screen will display the item. Click the Delete button.
IMPORTANT: Make sure Unpublish Content is checked when deleting. If your item is linked to others, a warning will display.

2B. You can also right-click the item and select Delete from the drop down context menu.
IMPORTANT: Make sure Unpublish Content is checked when deleting. If your item is linked to others, a warning will display.
Deleted items are held for 30 days before being permanently deleted.
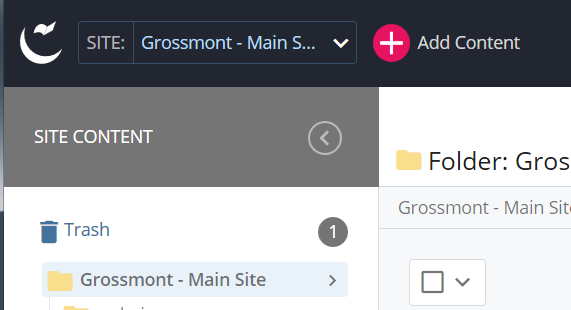
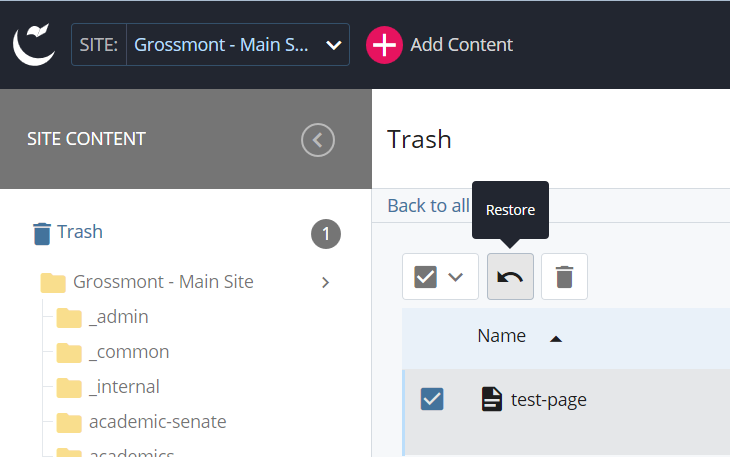
1. To Recover an item that was deleted by mistake, make sure the site it was deleted from is selected.
The Trash Bin icon will display in the upper left of the screen with the number of items in the Trash Bin.
2. Click on the Trash Bin icon. The item(s) deleted within the last 30 days will display.
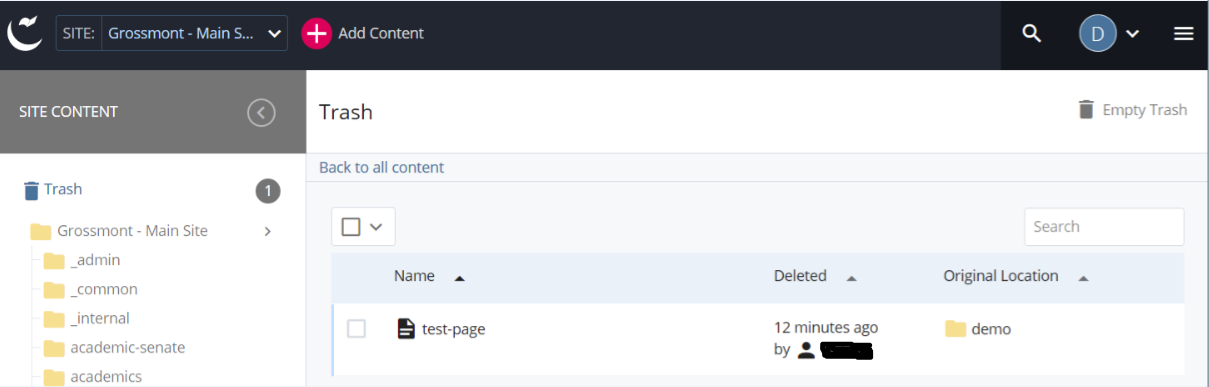
3. Select the item(s) you wish to Restore, then click on the Restore icon. The item(s) will be restored to the original folder.
8800 Grossmont College Drive
El Cajon, California 92020
619-644-7010
Accessibility
Social Media Accounts


